Sunday, 17 August 2014

More Bolt Action

Gaming day again today and the run on Bolt Action continues!

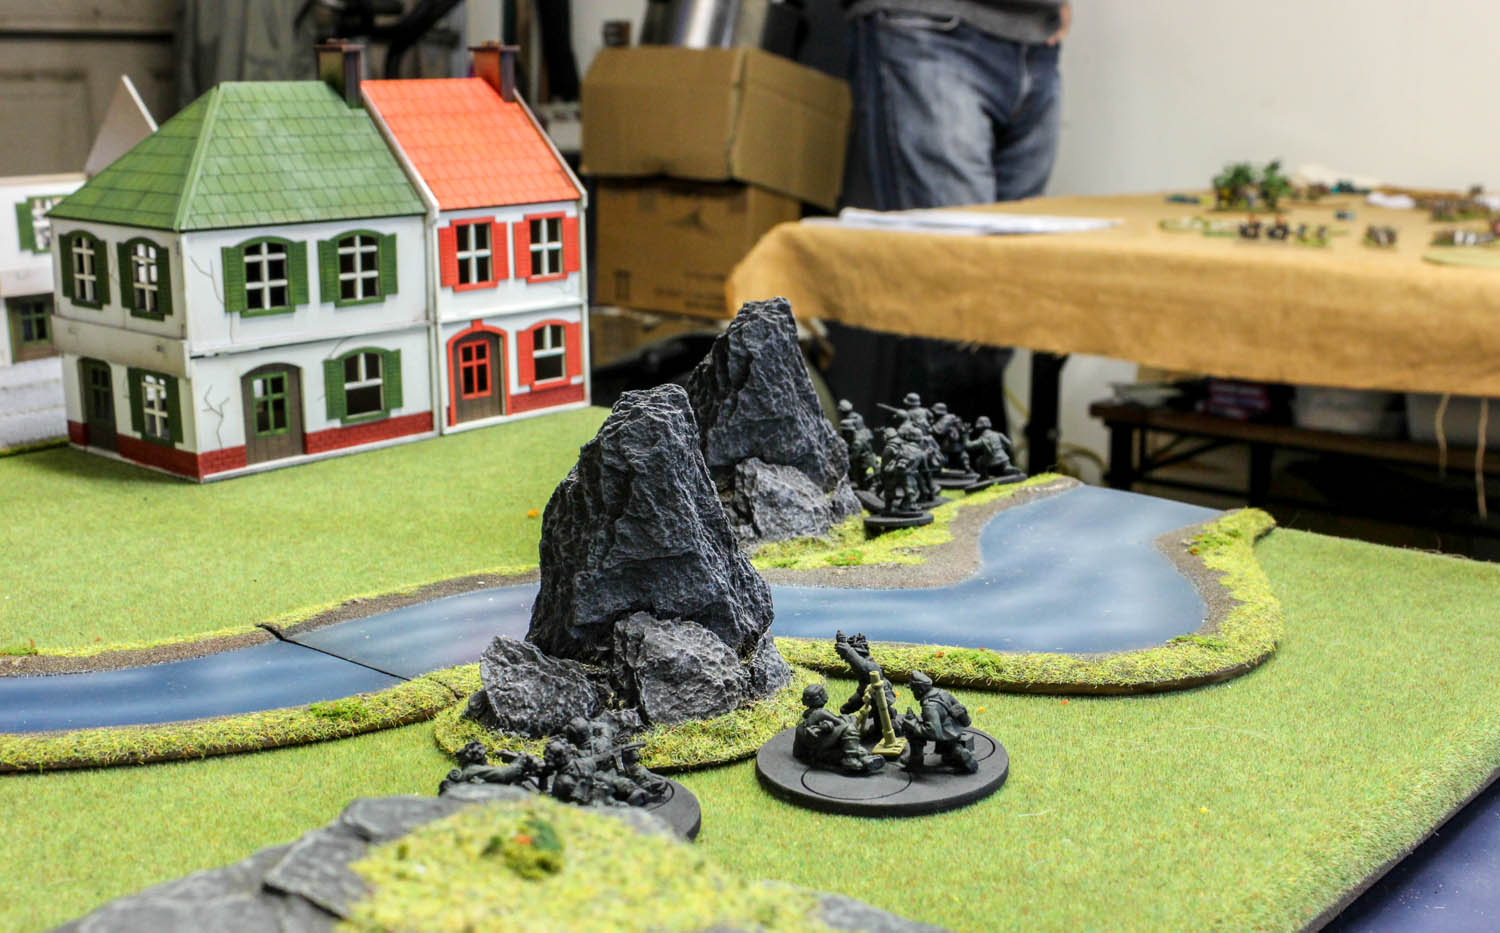
Rob was back in action this week, so he got to face Phil's USMC. Their game was underway when I arrived. I'm not sure on the end result, but I'm sure Rob will post up some commentary on his blog (Painted Addiction) later. I took a few photos though... but only a couple of decent ones.


Once they wrapped up, Mark and I played a game as I was keen to face a more historical foe. I'd also changed my army list around a bit based on what I had been reading on the Warlord forums. I decided to run with this:

Reg. 2nd Lt. + assistant (modeled with smg)
3 Reg. squads of 8 (NCO with smg, 1 lmg, 6 rifles)
1 Vet. squad of 7 (NCO with smg, 3 smg, 3 rifle, 4 panzerfaust)
Reg. Light howitzer
Reg. Medium mortar with spotter
Reg. Sniper team
Reg. StuH42
Reg. Puma

The Vet's and  Puma would be my tank hunters. I'd have 3 units capable of dealing out some decent HE whilst my Reg. squads advanced or held any objectives.

Mark fielded his British infantry list (all Regular):

2nd Lt. + assistant
4 Squads of 10 (2 smg, 1 lmg, 7 rifles)
1 Medium MG
1 Light mortar
Staghound
Cromwell
Forward artillery observer

He choose "Rapid Fire" as his special rule for this game.

The mission we rolled up was "Demolition".... so we both immediately deployed our bases in the top floor of a building in our deployment zone.... perhaps not the best idea in hindsight from a game perspective...

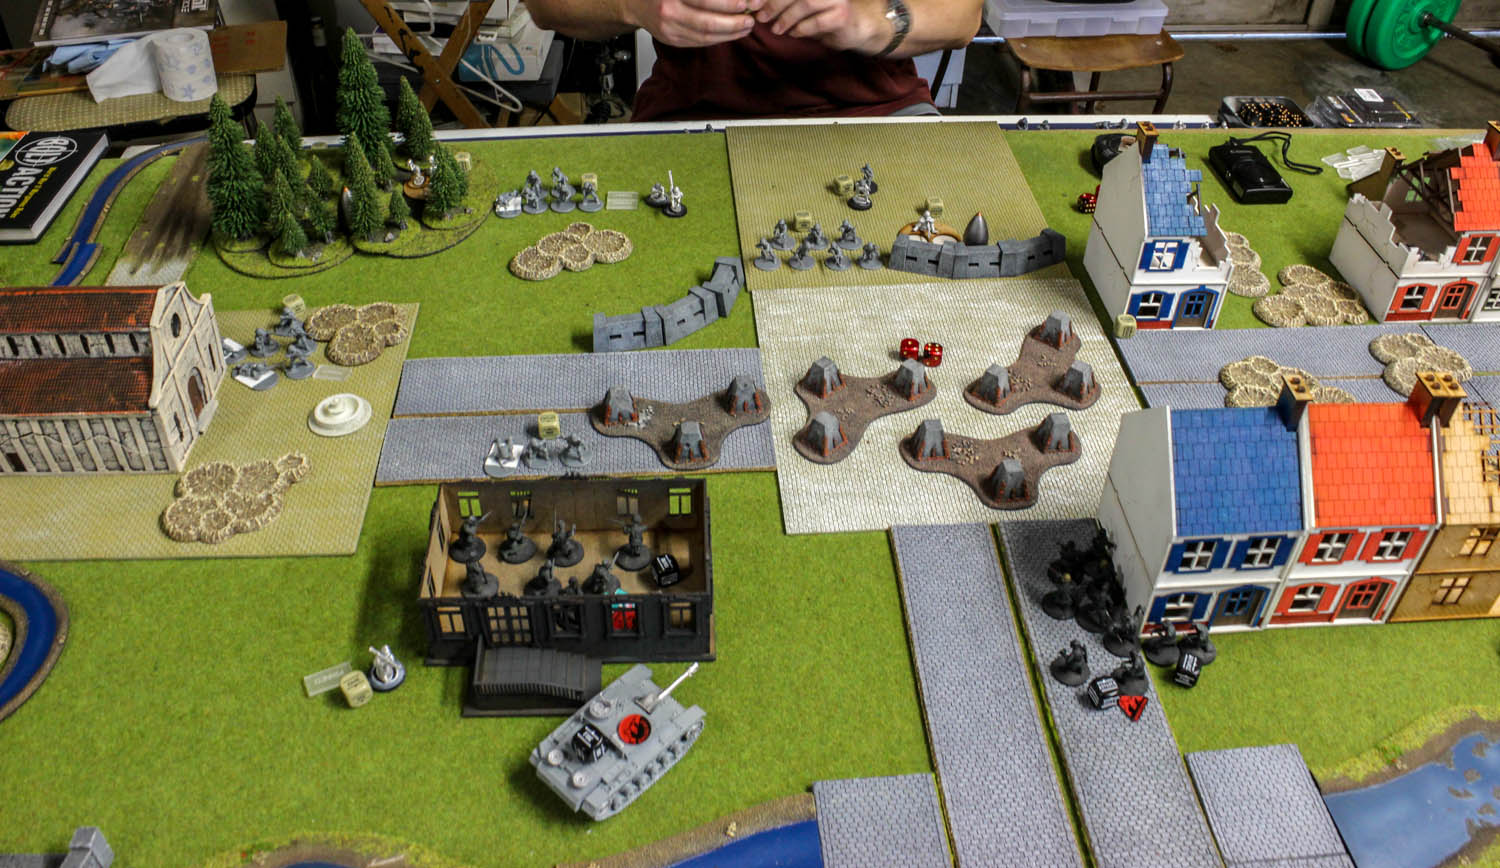
We used the same table Rob & Phil played on with no changes and it was a little open. You can see the British Staghound conducting a recce mission before being officially deployed (it was the objective used in the earlier game).


I would deploy on the table edge on the left hand side with the chateau. Both us deployed our vehicles. Mark chose to deploy 2 additional infantry squads, whilst I deployed my mortar, sniper team and 1 infantry squad to support the vehicles.

And then we started... with the Puma getting the drop on the Cromwell...


But it only gets a pin.... stops from doing anything for a turn though as it fails its order check.


The Staghound pops around to try taking a shot at the Puma, but the Puma commander sees him coming and utilises the duel steering to race the Puma well away from the Staghound and towards the main German force.


Reserves start arriving for both sides and the British MMG takes up position in one of the buildings only to be obliterated by the StuH42. The Cromwell decides to try and take revenge popping out to have a go...


The shot goes wide. The German advance continues.


The Staghound positions itself to deal with the German supporting units, but only manages to put a pin on the mortar. In return the advancing Vet's fire a couple of panzerfausts at long range, but they're wasted shots (I figured they probably wouldn't last long right in front of the Staghound...).

Then, disaster for the British... the Puma pops out and takes a shot at the Cromwell. A very lucky shot indeed which does just enough to knock out the Cromwell.


Things are looking okay for the German side. Infantry units are advancing. The Vet's fire the remaining 2 panzerfaust at the Staghound, but only pin it.... this may not be so good....


Unfortunately my infantry aren't as lucky with the British infantry and Staghound decimating a number of units. Still... in most cases they stick around.


By this point Mark is convinced that the game will be a draw and it seems pointless going on. But I refuse! There is a chance. I could make it.... an outside chance, but a chance to still win the game. It will need to go an extra turn....

The British infantry line themselves up and I decide to try a tank assault. One British unit breaks, but the other remains. I then finally manage to get one of my units into the building holding the British base (it's on the second floor).... the Staghound drives up to the window and lets rip with MG fire pinning my unit. 

So.... I'd need to:
  • Roll a 4+ to have the game go for 1 more turn
  • Get the first order die to activate the Puma
  • Knock out the Staghound with the Puma
  • Successfully pass a morale check to order my unit in the building to run upstairs.
I roll a 4, get the first order die and the Puma fires at the Staghound....


I get the next order die and roll the morale check for my unit in the building who have 1 pin marker...


I'd rolled a 9 for the morale check to place an order on them which meant they'd go down (I needed an 8 or less with the pin marker on them). 

Game over.

A draw.

Mark was right.

So then we packed up and starting thinking about what to play to round out the day.

Then I realised that I was an idiot.

The unit in the building was the Vet. unit.

A 9 would be a pass. They would have been able to run upstairs!

So, technically it was a victory. Technically... :) Will teach me to pay better attention to my units next time!

As for the rest of the afternoon... we had a quick look at the Hail Ceasar rules since both Mark & Rob have gone a little crazy on ordering 28mm Greeks & Romans. Something I'll be avoiding, but we figure our existing FoG armies will work okay with the rules. So, Mark and Rob tried out a quick combat using the Hail Ceasar rules. I just took a couple of photos... :)


Finally, welcome to a new follower - Scott Bowman from Scott's War-gaming. Check out Scott's blog. It's a great place for anything LoTR gaming related.

Monday, 11 August 2014

It's Official!


This is the longest we have stuck with playing a single game over an extended period in ages! :)

I reckon that's a pretty good sign that we are really enjoying Bolt Action and it is definitely good. Like all games, it has its quirks and slightly odd rules, but overall its pretty good. It's also a period of history that I have a great deal of interest in.

I was a little late to gaming this week and a little slow.... Saturday night had been a farewell dinner for my Personal Trainer. It involved an evening of beer, curry, whiskey, more beer, more curry, more whiskey :) Top notch evening.

When I arrived, Mark and Phil were already underway with a 1000pt game. British Infantry vs. USMC. I believe the mission was Point Defense. Mark was the defender.

I snapped a few pics during the game. They'd decided to have no buildings for a change and set-up more off a wooded area for the battle. The USMC was having a tough time from the get go with advancing into the British guns. Casualties were heavy.


Mark's commander charges forward SMG's blazing
Things are going pretty well for Mark. The game is under control and in the bag. The USMC are losing units and struggling to make any headway.

The British start a general advance to push the USMC back and mop up any survivors. But, catastrophe strikes! The FAO's bombardment arrives, but the British artillery rounds start falling short... landing on the British units!! (Mark rolled a 1 for his bombardment handing it over to Phil....).

The British centre now pinned under their own bombardment
The USMC can sense they have been given a chance and push forward. The game hangs in the balance now with British units struggling to rally (Mark's commander had died charging forward earlier). 

With what units can rally, the Brit's scramble and try to take out the most advanced USMC units, but the USMC commander makes it to an objective. The British Staghound and Cromwell make short work of the units advancing on the other objectives as the game draws to a close. 

And it ends as a draw. It was very nearly a defeat that was snatched from the jaws of victory by a single die roll.... Rolling that one was a bitter blow for Mark as he had the game totally under control, but with some hard work and tough decisions... he was able to bring it back to at least a draw. 

I think this game really highlighted the need for HQ units to be able to interact and support friendly units better. No matter how hard Mark tried, once units had 3 or more pins on them, he just couldn't pass the order check to rally them. Leaving them with a down order just seems pointless as each pin they lost was just being replaced from taking more fire. Certainly keeping his Commander alive would have helped, but in most cases the +1 support would have done little to help rally the troops.

My suggestion... allow the HQ unit to use there order die to instruct a pinned unit (with no current order die) and within 6 inches to act (both units then place an order die next to them showing the order that was carried out). Only actions would be rally, fire or run (away from the enemy only). Probably needs a whole lot more thought though.... 

By this point it was getting a little late in the day (and I was full from the leftover curry I had for lunch :) ), so Phil and I rocked out a small 500pt game. German Infantry now facing the USMC. To make things easy we just choose to play maximum attrition.

I fielded (all regular);

Second Lt. + assistant
10 Man Squad (2 smg, 1 lmg)
9 Man Squad (1 smg, 1 lmg)
Medium Mortar + spotter
Light Howitzer
Medium MG
Sniper Team

If I recall correctly, Phil had:

First Lt. + assistant
2 Squads (2 bar)... I can't remember how big the units were
Medium MG
F.A.C
Engineer Squad (flamethrower)

The German's support weapons take up position whilst one of the infantry squads advances forward....


Only for the infantry squad to find themselves in view of the USMC F.A.C... who happily targets them for an air strike. 


Knowing that every unit within 12 inches will pinned by the air strike, I just keep advancing the infantry towards the USMC units. Between them, the MMG and mortar, they start making short work of the USMC units nearby. Somehow... the US air strike fails to materialise for a couple of turns and the return fire hardly scratches my infantry unit (even at short range and in the open).

By now this is all that is left on the table...


I've taken no losses. Phil has his Commander, F.A.C, Engineer squad and 1 sole survivor from an infantry squad. Then the air strike arrives.... and all it does is pin my infantry squad (look for the blue die) and the US Engineer squad. A couple of turns of concentrated fire later....


Now even less USMC troops are left.... just the F.A.C and the US Lieutenant's assistant (the German sniper having spotted and killed the US Lt.)  They want revenge though and the second air strike is called in to at least try and do some damage to the German units.... 

The US F.A.C catches the unmistakable growl of a Pratt & Whitney engine as the air strike comes in... he hears the whistling as the Corsair dives, but to his horror... he realises his error! He's given the wrong co-ordinates! (Phil rolled a 1 handing over the air strike to me....) 


The US air strike targets and destroys the US F.A.C. Game over. All USMC units destroyed. No German units lost.

On review, I think Phil tied up too many points in a 2nd Lt. and the F.A.C. I think he would have been better off with more boots on the ground utilising the US special rules for no penalty when moving and shooting. The extra firepower would have made things tough for me.

Finally, we've been a little inspired by this... Wargame Bloggers Quarterly. We'd like to aim for trying to submit an article at some point, but we need to do a whole heap more painting and terrain work first! :)

As it was, Mark had gotten out his Western stuff and set-up a little scene. I really needed my tripod, but took a couple of photos anyway. Decided they'd look best in black & white...


Until next week. Happy gaming :)

Sunday, 10 August 2014

First Milestone!

I've reached my first milestone as a blogger - 10 followers! I know there are a heck of a lot of great wargaming blogs out there, so I'm pretty happy to have 10 people who are happy to have a browse through my ramblings :)

I'd like to use this blog post to say a very big thank my first 10 followers and encourage you to check out their blogs (if you don't already). In no particular order....

Robert Wood - Painted Addiction
Mark Hazell - Kiwi Colour Studio
Francis Lee - The Angry Lurker
Simon Quinton - Brummie's Wargaming Blog
Chris Townley - Wargamer on Tour
Joakim Strom - The Miniatures Man
Grigork - The Megalomaniac (Mwhaha)
The Lord of ExcessThe Lord of Excess
Paul Waechter - Dog of War
Lee Brady - Harold's Revenge

I also know a few Google+ followers also keep on my blog, so thanks to you guys as well (especially Mark Griffin).

Hopefully I can keep you interested for sometime to come yet.

I've also noticed a few blogs giving me a welcome when they see I have added their blog as one I follow. I reckon that's pretty cool, so I will also look to do the same going forward.

Anyway, it's getting late. So that will be all for tonight. I'll be posting up a short report from today's gaming session tomorrow :)

EDIT... okay so this is the second post now where Blogger has published it with text highlighted.. I have no idea why as it's not like that in draft?!?

Tuesday, 5 August 2014

War Is Declared!

100 years and a couple of hours ago, the following message from the King was read out on the steps of Parliament House here in New Zealand:


This is an exert taken from the Wellington Evening Post that was published later in the day and is dated 5th August 1914 (so although Britain's declaration of war was on the 4th August, the time difference meant it was the 5th here).

You can see the full broadsheet from that day here. It's worth a look (for us Kiwi's anyway).

And with that we were at war with Germany in what would become one of the most disastrous wars in history that brutally dragged the world into the modern age. For New Zealand, it would forge us as a nation..... but our battles are some time away yet.

Why did it start? Not to make light of the day, but I have always felt this was the simplest and most poignant explanation of why it all started:


I'll be definitely keeping an eye on the commemorations and will trying to get to what events I can over the next few years.

I also saw this pop up today from the NZ Archives/ww100.govt.nz, which having an interest in history, I thought was pretty interesting:


The telegram that Lord Liverpool received advising that Britain was now at war. 

I wanted to write this post today to take a moment to remember and reflect as the centenary of commemorations start.


"Lest We Forget"

Sunday, 3 August 2014

Bolt Action: Germany vs USMC

Today, my Bolt Action German force got to face the best of the US.... the US Marine Corp. Hoorah!

I took a similar force to last time, but dropped the 251/1 armoured transport to fit in a few more units.

The end list was something like this:

Reg. Lt. + assistant
2 platoons of 10 Reg. troops (2 smg, 1 lmg)
1 platoon of 10 Vet. troops (6 smg, 2 lmg)
Reg. medium MG
Reg. medium Mortar
Reg. light Howitzer
Reg. sniper team
Reg. Sd Kfz 222
Reg. StuH42

The Marines turned up with a crap load of men. All regular. 14 orders in total. The force was something like this...

Lt. + assistant
4 platoons of 12 men (2 BAR, not sure how many SMG)
1 small squad with AT grenades
1 Engineer squad (with flamethrower)
Sniper team
Bazooka team
2 Medium MG
1 Medium mortar
Medic team
Forward air controller

This was going to be tough with so much fire power.... My first mistake was letting Phil set up an "interesting" table. Here it is:


A river in one of the deployment zones... never a good idea. Anyway, I rolled with it and left it as is, but I was pretty clear that the river was going to be played as rough ground apart from the crossings/bridges which would be open ground to at least give whomever had that side a chance.

And it would be me who would have to deploy on the river side. We'd rolled up Point Defense as the mission. Phil choose sides. I choose to be the attacker to counter Phil's numbers with half of his force having to go into reserve.

If I recall correctly, Phil deployed his mortar, sniper team, bazooka team, 1 medium MG, Lieutenant, engineers squad and FAC.

Objectives were placed and the German advance began. After a preliminary bombardment though. Which was reasonably effective with all but the Marine mortar taking a pin marker. Even better though, the Marine sniper team took a hit killing the spotter.


As much as possible, I brought units on where I could use the buildings to cut down on firing angles. I really did not want to collect a few pins early on with so much distance to cover.

The first and second turn were quiet as a large number if the Marine reserves failed to arrive.

My troops position themselves, but slowly. Too slowly.


My sniper finishes of the Marine sniper team and the StuH42 decimates the Marine MMG team. A few more pins are spread around. One of my infantry squads gets into the Chateau for cover... this would prove to be a bad idea...

The Marine bazooka team sets it sights on the StuH42 and charges towards it. German fire manage to take out the loader.... but the Marine with the bazooka makes it around the building.... uh oh...


The shot hits home immobilising the StuH42. Then this happens...


This was the last thing I needed on my Vet infantry squad. But there is some success though....


See that unit of Marines next to the forest... a direct hit from my mortar team obliterates them (I rolled a 6 to range in first time). Fire from the German forces is definitely causing a lot of casualties among the Marines. The immobilised StuH42 deals a heavy blow to the second Marine MMG. But... the Marines keep passing their order checks and removing pins. 

My units are up, but have a huge piece of open ground to cross to get to the objectives and time is running out..... (the rather large shells are standing in as objectives... see if you can spot them :) ).


The unit in the Chateau find themselves facing the bulk of the Marine force and the pin markers start stacking up...


A couple of pin markers later and they're gone.

In the last few turns of the game, I manage to get a large number of pins onto the two units of Marines guarding the objective in the building. My Vets get into position to charge... but then disaster...


The Engineers flamethrower puts on some extra pin markers. I pass my morale check, but fail my order check. The unit goes down.... and then the game ends. This is all that's left...


Hardly any Marines left, but the Germans aren't in good shape either. The Marines had done their job and held me off. Too slow and too cautious. I really needed to get up quicker in the first couple of turns and take the risk of getting a pin marker or two while there were only a few Marine units on the board. Still, it was always going to be a tough challenge on such an open table.

Man of the match - would have to be my mortar team. Proved very effective in this game. Definitely a very useful unit especially when it dropped a mortar round directly onto the head of the Marine FAC :)

US units not having a modifier to shooting from moving is brutal. So far, it seems to be a pretty broken rule, but that's probably because we're still figuring the game out. 

Once thing I do notice though, is that once you get a few pin markers on a unit, then that's pretty much it for that unit. It's just too hard to even try and get a rally order off. Staying down doesn't seem like a good option with the limited turn number of most games and the likelihood of just having more pin markers added each turn anyway.

I do wonder if the HQ units should be able to do more. Say, use their order to rally a unit within 6"? The game just seems to be missing an option to have higher command units interact more with other units to help support them.

Still. All good fun.

Just the one game again for me today. Chris had come along, so he and Mark rocked out a game of FoG. Here's a couple of pics...


The game looked awesome with all the very nicely painted mini's.

Until next time.